System restore is used to restore your system to a previous state. This is a backup of your core Windows system so if you encounter boot-up or hang-up problems, you could restore from a saved system profile.
The system restore feature is ideally enabled before you do something crazy to your computer – like installing new hardware that doesn’t have a signed Windows driver or opening a file from an un-trusted source.
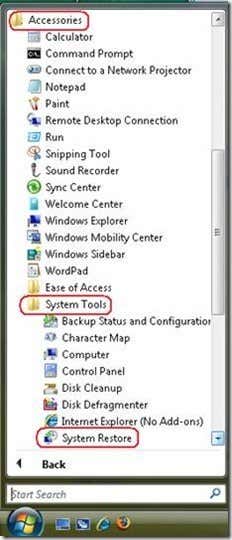
To enable or disable system restore in Vista follow the steps below.Click on Start > All Programs > Accessories > System Tools >System Restore. This will open the system restore window.
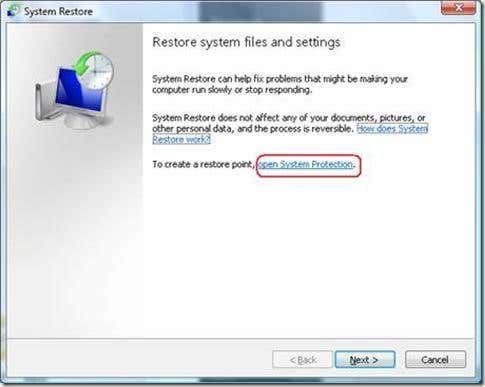
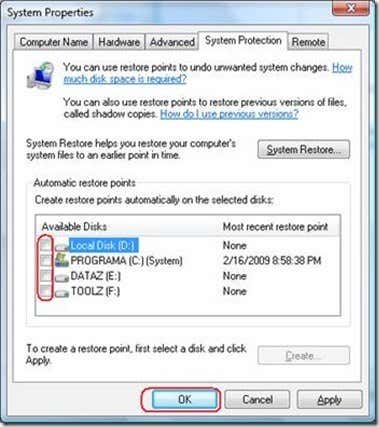
Click open System Protection on the system restore window to open the system properties window.
On the System Properties window you will be able to see all the available partitions and the most recent restore points.
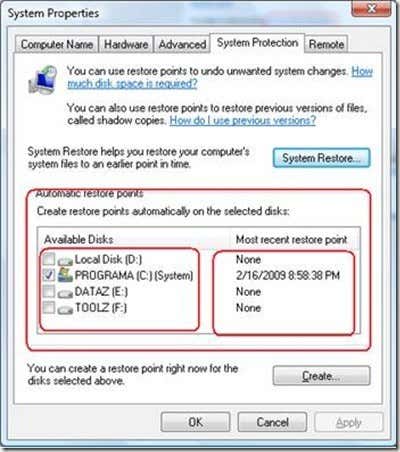
By default system restore on drive C:/ is enabled. To enable system restore to other partitions just click on the check box of the partition where you want to enable system restore and click OK.
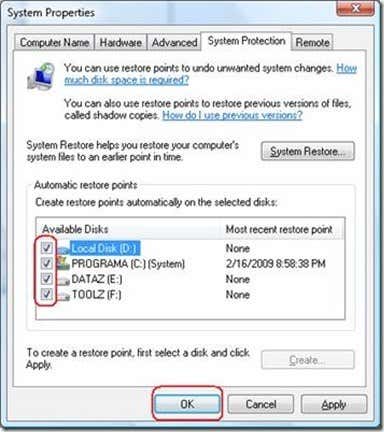
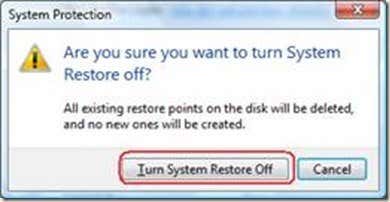
To disable system restore, just uncheck the checkbox on the partition you want to disable it for. Unchecking all boxes will completely disable system restore. When you uncheck a box for a certain partition a security warning message will pop up, just click Turn System Protection Off to disable system restore. Note: It is recommended to turn on system restore on your system partition (Drive C:/)
System restore does not backup your documents, it only affects the registry and system files used by Windows. This means if you have your email or pictures deleted, system restore will not be able to help you with that. All it does is save restore points of system files, so you can use it to boot or restore from that restore point.


Tidak ada komentar:
Posting Komentar